Customize ticket and contact forms
Get started
Note
In case you are using Plumsail HelpDesk 2.1.1 and earlier, please use this documentation instead.
You can create custom forms for your HelpDesk Tickets, Contacts, and Organizations lists using Plumsail Forms for SharePoint (see License notes below).
Follow the steps to get started:
Download and install the Plumsail SharePoint Forms designer.
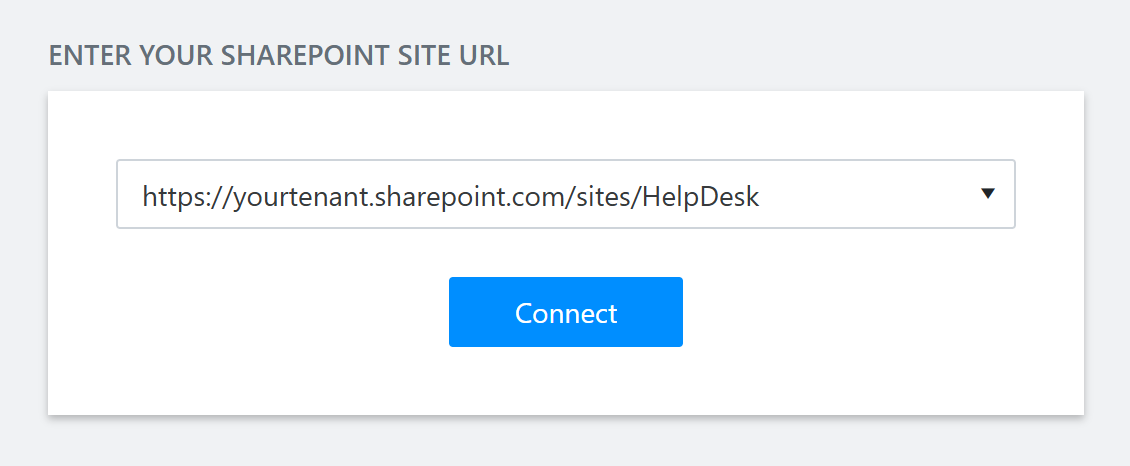
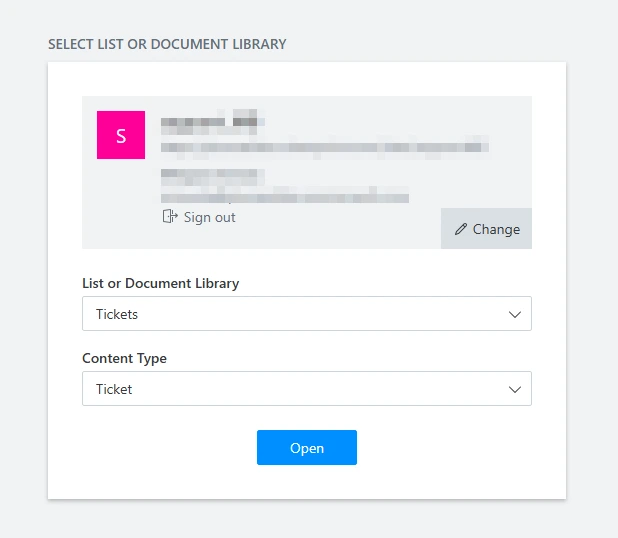
Connect to your HelpDesk site and select a specific list or document library.
Basic customization
In this section, we’ll cover the most common customization tasks for HelpDesk forms. You’ll learn how to create and edit custom forms, as well as how to restore, export, and import them when needed.
Modify forms
To edit a form with Plumsail Forms, you need to connect to the list that the form is based on. Let’s walk through an example.
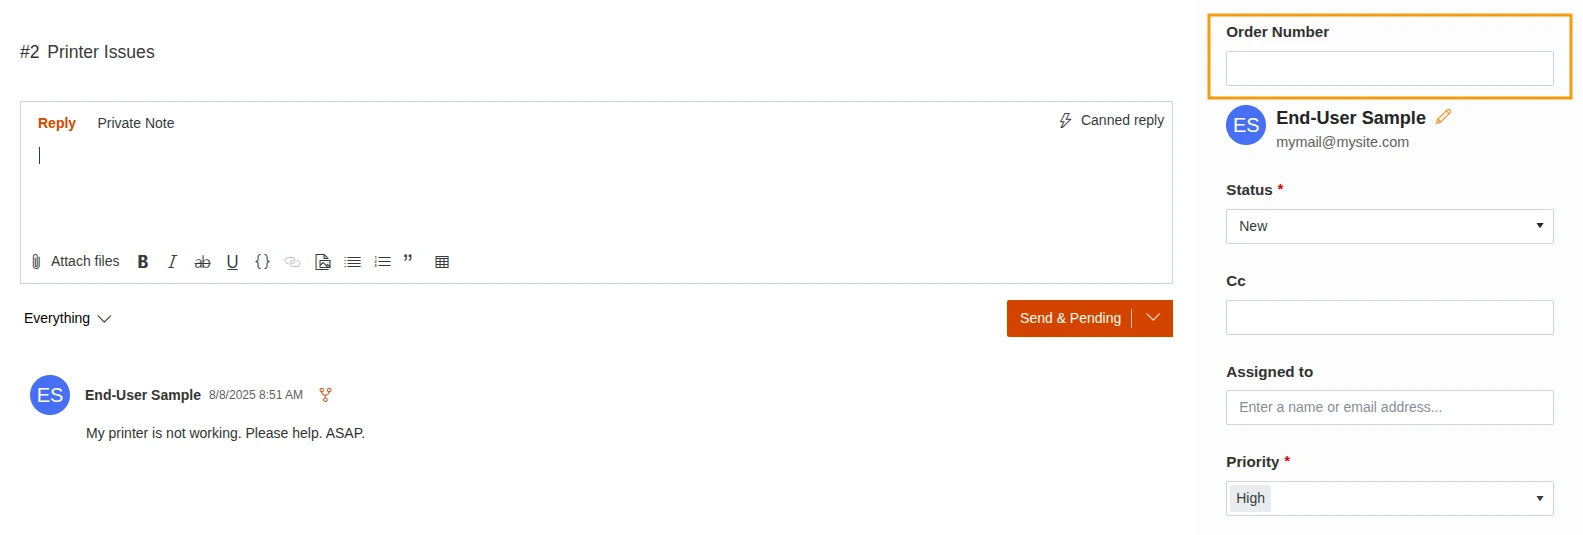
First, imagine we need to add an “Order Number” field for our tickets.
To do this, you’ll first create a new column in your ticket list.
Choose the column type that best suits your task. You can then expand the options section to configure details such as unique values and required fields.
In our case, we need a Number field.

Note
Learn more about column creation and field types in SharePoint Forms.
Next, open the form designer. Select Tickets from the list dropdown menu and click Open.
Once the editor loads, you can begin designing your custom form.
Be aware that there are three types of forms: Edit, New, and Display. To ensure that the design for one form type is not accidentally applied to another, it is crucial to save each one separately after making changes.

Choose the form type you want to customize and locate your newly created field in the left panel.
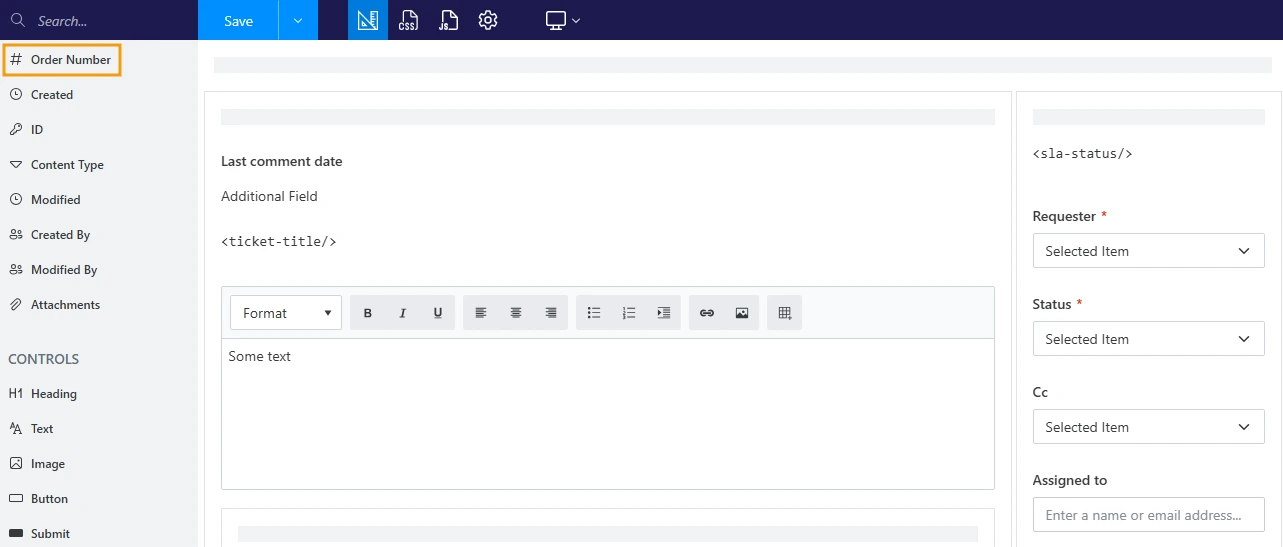
Simply drag and drop the field where you want it on the form.
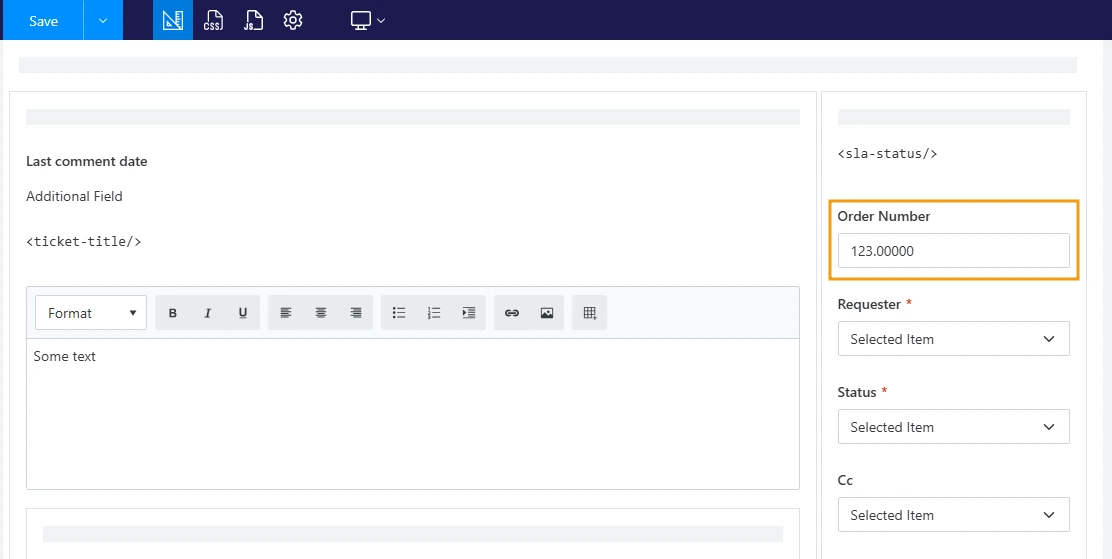
Finally, save your changes and check your HelpDesk ticket form to see them applied!
For more advanced features and a full overview, be sure to check out our Forms for SharePoint documentation.
Restore forms
We highly recommend trying out form customizations on a test HelpDesk instance first. If everything works as expected, you can then apply the changes to your production environment.
However, if you accidentally break a HelpDesk form or regret some changes, don’t worry! You can easily roll back to a previous version or to the form’s default design.
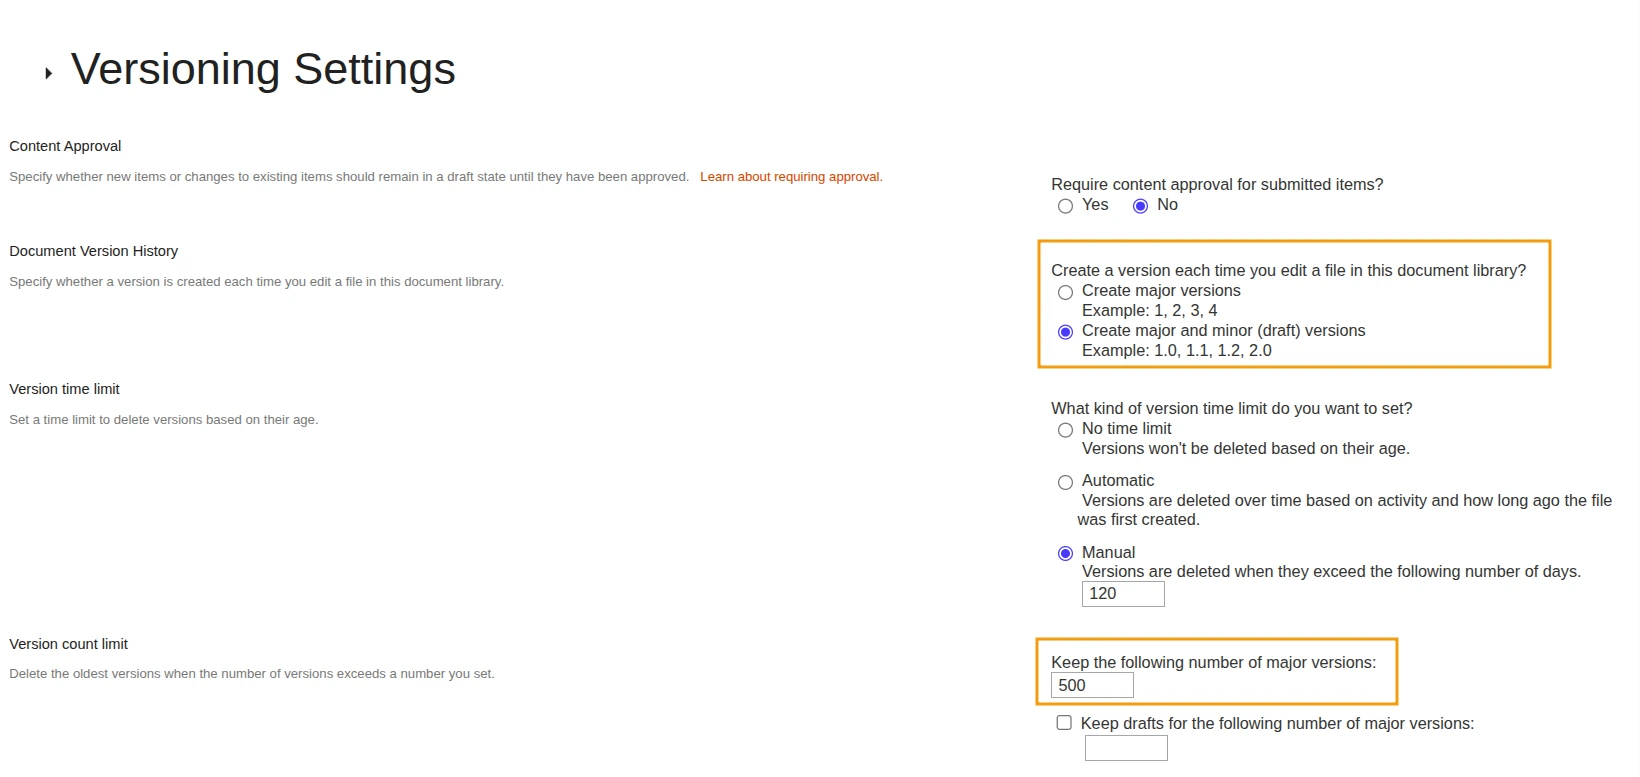
To accomplish this, it’s important to enable version history for your forms. You can do this from the Versioning settings page:
Note
You must have the Manage Lists permission capability to enable or change versioning.
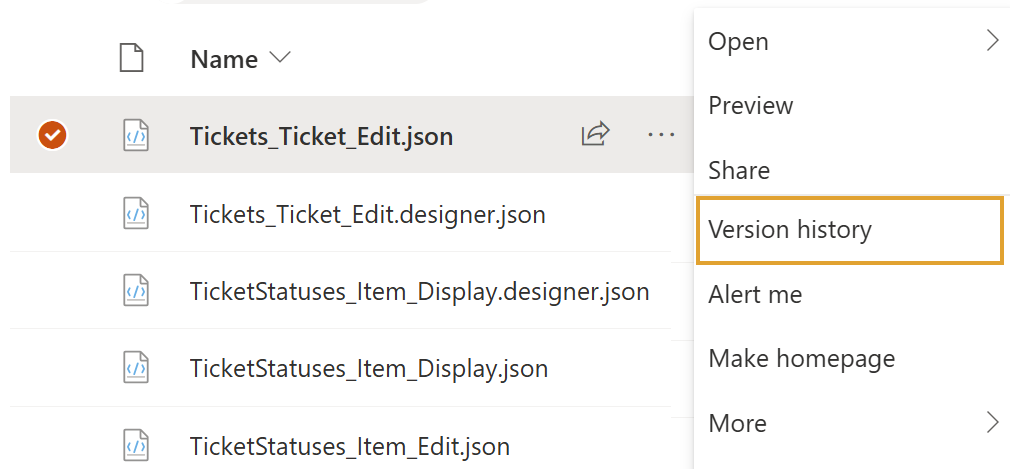
Once versioning is enabled, you can manage your forms. Just navigate to the Site Pages library, open the PlumsailForms folder, and locate the form you want to revert to a previous version.
Click the ellipsis (…) next to the file name and select Version history.
Identify the version you want to go back to, and click Restore.
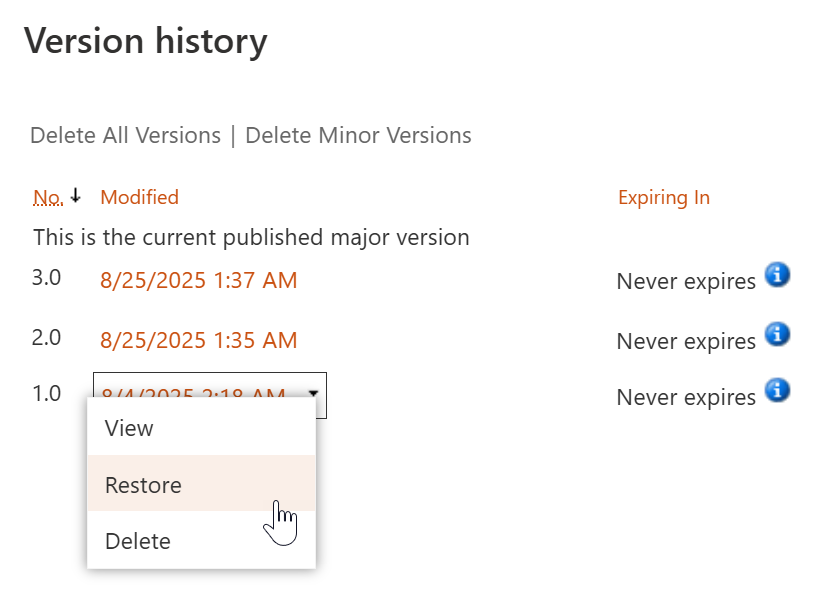
That’s it! You can now open the form in the designer and continue working from the restored version.
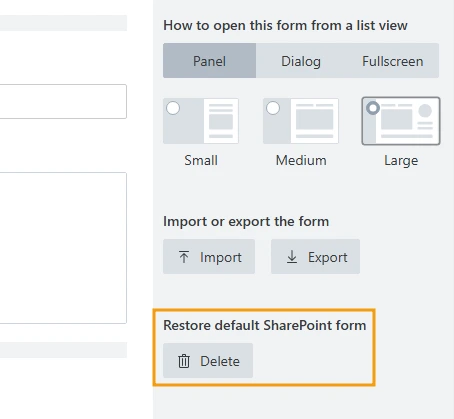
If you need to go back to the original default version, you can do so directly from the designer.
Find more detailed instructions in this article.
Export forms
In case you want to save a copy of your form’s schema for safety reasons or to share it, you can easily export it from the designer interface.
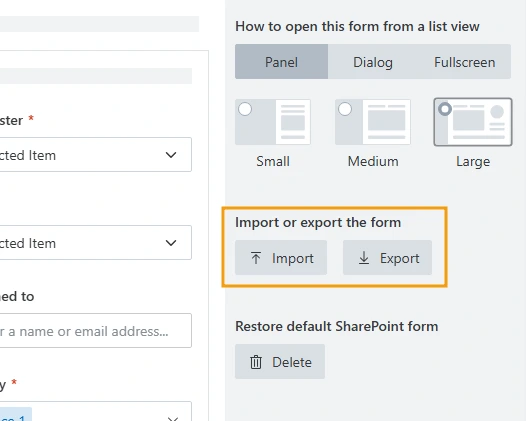
Similarly, you can also import forms to start working from a pre-existing design.
Advanced scenarios
If you’re looking for more advanced customization options, check these examples and articles that can help you with your use cases. You can explore them to learn about more complex configurations and solutions.
License notes
Note
Learn more about our HelpDesk plans.
Plumsail Forms is included in the “Yacht” and “Ocean liner” plans. Even though you may see a trial message in the Plumsail Forms UI, you still have full access to customize your HelpDesk forms for tickets, contacts, and organizations.
If you wish to customize forms for any other SharePoint lists, a separate, full Plumsail Forms subscription will be required.
Plumsail Forms must be purchased separately for the “Jet Boat” plan.
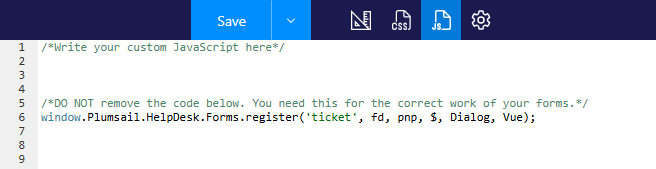
Important: Do not delete the default JavaScript code—only extend it if needed. Otherwise, you will receive a notification in HelpDesk forms that the Forms trial has expired.